BaBar SVT Online Event Display
I used the following tags in 7.7.2:
OdfOffline: V00-03-02
OepFramework: V00-06-05
OepRemoteFramework: V00-02-00-ahs1
OepSim: V00-00-02
PackageList: V00-03-46
SvtGeom: V00-03-02
SvtGra: V00-02-18
SvtOep: V00-01-13
SvtOepSequences: V00-00-01
workdir: V00-03-03
However, I have made quite a few changes in these packages (especially in SvtOep), so it might be easier to copy over the following modules from /afs/slac.stanford.edu/u/ec/natalia/work/online7.7.2:
SvtGeom: SvtGeomSelections.hh(cc).
SvtGra: SvtGraHitRep.hh(cc); SvtGraDetDrawers.hh(cc).
SvtOep: AppUserBuildTC.cc; GNUmakefile; SvtOepDisplay.cc; SvtOepDisplay.tcl; SvtTC.tcl.
The event display application serves as the "client" for the trickle stream. In order to make the event display executable, type "gmake SvtOep.binds". The executable will also be called SvtOepDisplay.
You can also just use the executable I made. It's in /nfs/farm/work/natalia/SvtOepDisplay.
The server side of the trickle stream connection is a little tricky. Since I have not been able to try things out at IR-2, I used a very slightly modified version of SvtOepTCApp, with fake event transitions (handled by the SvtOepSimTransition module in SvtOep). If you would like to try this out, you can just type "gmake SvtOep.bintc" with AppUserBuildTC.cc as in /afs/slac.stanford.edu/u/ec/natalia/work/online7.5.1/SvtOep. Then you will be able to use SvtOepTCApp as the server application.
I assume you have both the server (SvtOepTCApp) and the client (SvtOepDisplay) ready. Then, start the server application, in the usual way:
../bin/SunOS5/SvtOepTCApp ../SvtOep/SvtTC.tcl
I usually do "ev begin -nev 1" first to find out the port number on which the trickle stream is listening. You should see a message that looks like something like this:
OepFTcpLinkModule::beginJob(): Trickle stream server listening on TCP port number 24373
(24373 is the random port number that I put into SvtTC.tcl; one can easily change it interactively by doing "module talk OepFTcpLinkModule", and setting the parameter portNumber to the desired value).
Now, let the server application run. While it's running, start the client application -- for example, in another window -- like this:
source GraDisplay/setup.csh
../bin/SunOS5/SvtOepDisplay -h hostname -p portNumber ../SvtOep/SvtOepDisplay.tcl
So in our example the portNumber parameter will be 24373. If the trickle stream connection is properly established, the event display should appear.
Before you start this, however, make sure that your $OO_FD_BOOT points to a valid 7.7.2 database, otherwise the application won't be able to build the nominal geometry! You can use my database with the command setenv OO_FD_BOOT /nfs/shire01/objy/databases/Test/users/natalia/7.8.2/BaBar.BOOT.
The first thing that you are going to see when the event display application starts is the main driver window which looks like this:
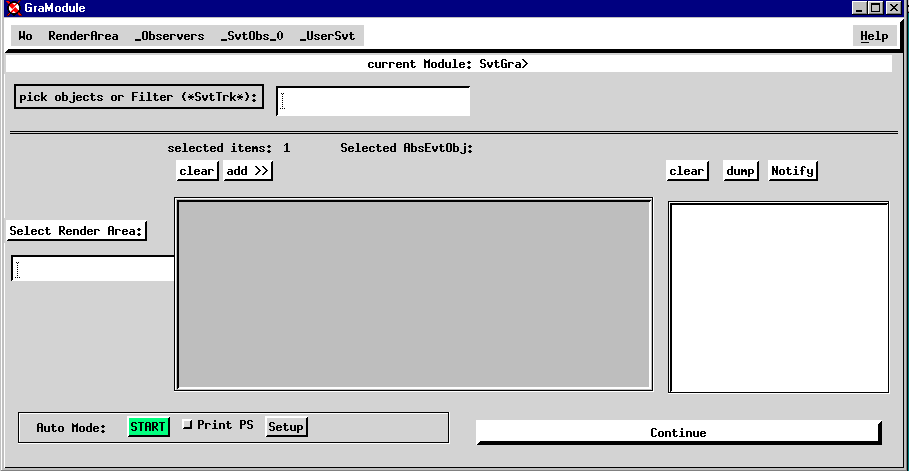
This window allows one to manipulate observers, which are basically the windows that show the SVT and/or the data. In order to edit an observer, go to the _Observers option of the main driver window, and select the _Edit option, like this:
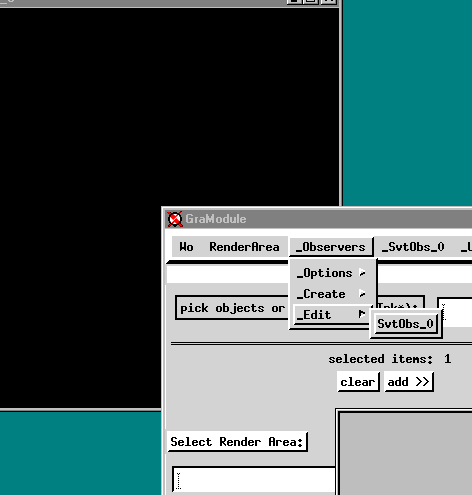
This will open the observer's menu window, which looks like this:
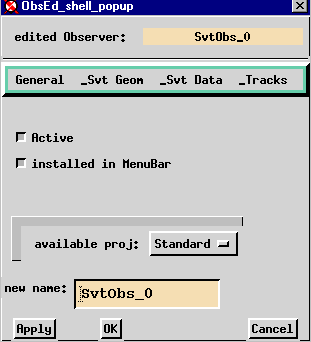
This menu has the following options:
1). _Svt Geom contains the geometry options, which are currently barrel wafers (Svt Barrel W.), all wafers (Svt Wafer), all wafers + ribs + the space frame (Svt All). It also allows one to display individual layers.
2). _Svt Data allows one to display SvtGHits, SvtHits, and SvtSpacePoints.
3). _Tracks contains the available track options, such as GTracks, SvtTrks, etc..
This picture shows the observer with the "Svt wafer" geometry option selected:

When you are done selecting what you would like to see, just press "Auto Mode: Start" (the green button in the lower left hand corner of the main driver window). The event display will be updated automatically every 3 seconds. The frequency of updating is controlled by the SvtGra module parameter waitTime, and can be set interactively.
Now, the Observer also has a different menu of options which allow one to rotate the image, create postscript files, etc.. In order to see this menu, go to the observer's window, and press the rightmost mouse button. Here's what you should see:
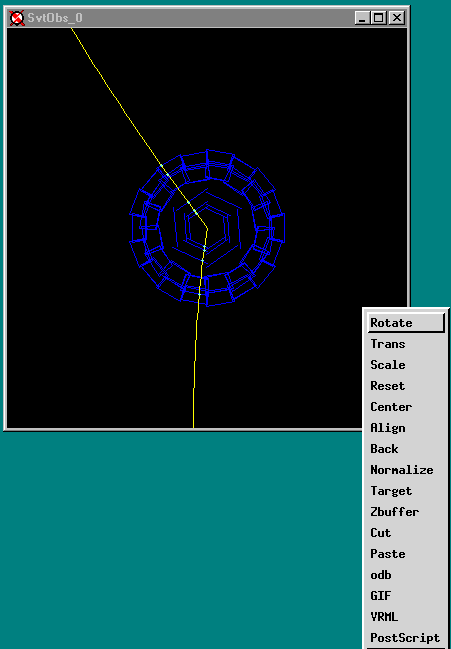
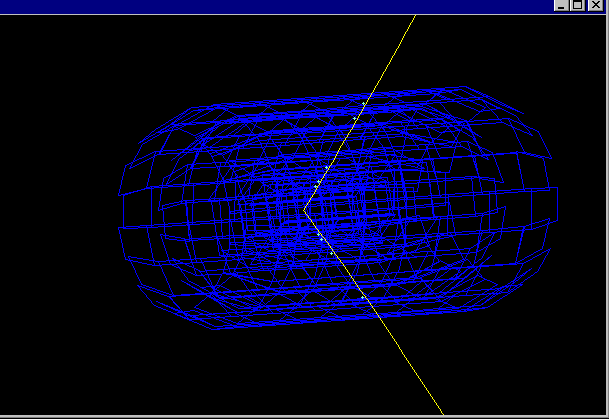
In order to rotate the picture, select the "Rotate" option as shown on the picture, then press Ctl and drag the image about with the leftmost mouse button keeping the Ctl button pressed. Here's a rotated image:
Another useful option is zooming on details. In order to do this, press the leftmost mouse button and drag the mouse across the detail you would like to see magnified (you don't have to press Ctl in this case). You will see that the selected region becomes highlighted. Then go to the main driver window, and select the option "Zoom on select. items" from the RenderArea menu, like this:
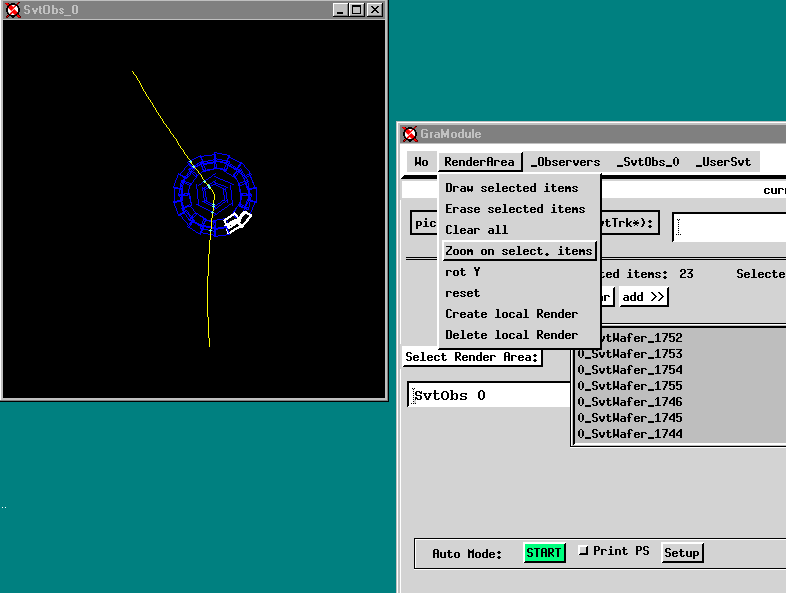
In order to clear the selection, just press "clear" on the main driver window.
To go to the next event (or to the framework prompt), click on the Continue bar in the lower right hand corner of the main driver window.
natalia@charm.physics.ucsb.edu


